
Information
This article will show you how to setup and use ReadyBoost in Windows 7 with USB flash drives and flash memory cards to help speed up your computer.
Note
· You can enable or disable ReadyBoost for a specific flash drive or other removable storage device (ex: memory card).
· For ReadyBoost to effectively speed up your computer, the flash drive or memory card should have at least 1 GB of free available space.
· Windows 7 shows you how much space it recommends that you allow it to reserve and use on the flash drive or memory card for optimal performance at the bottom of the properties window. (See screenshot below step 4B below)
· If your flash drive or card doesn't have enough available space for ReadyBoost, you'll see a message telling you to free some space on it.
· For best results, use a flash drive or flash memory card with at least double the amount of available space as the amount of memory (RAM) in your computer.
Warning
· If your Windows 7 is installed on a solid-state drive (SSD), you may not see an option to speed up your computer with ReadyBoost when you plug in a USB flash drive or flash memory card. This is because SSD drives are faster and they're very unlikely to benefit from using ReadyBoost.
· In some situations, you might not be able to use all of the memory on your device to speed up your computer. For example, some flash memory devices contain both slow and fast flash memory, but ReadyBoost can only use fast flash memory to speed up your computer.
· ReadyBoost cannot beat the performance gain by just adding more RAM in your computer instead.
Here's How:
1. Plug a USB flash drive or flash memory card that you want to use ReadyBoost with into your computer.
2. If AutoPlay pops-up, click on Speed up my system. (See screenshot below)

A) Go to step 4.
OR
3. If AutoPlay does not pop-up, then open the Start Menu and click on Computer. In Computer, right click on the USB flash drive or flash memory card, and click on Properties. (See screenshot below)

4. To Turn On ReadyBoost -
A) To use all of the flash drive or memory card free space for ReadyBoost -
Select Dedicate this device to ReadyBoost. (See screenshot below)

B) To specify how much free space on the flash drive or memory to use for ReadyBoost -
Select Use this device. (See screenshot below)
Either slide the slider or enter the amount of free space you want to reserve to ReadyBoost.
NOTE:
See the note box at the top of the tutorial for details about how much free space to use.

5. To Turn Off ReadyBoost -
Select Do not use this device. (See screenshots above)
6. Click on OK.
7. You will see this for a brief moment while Windows 7 configures the ReadyBoost cache on your flash drive or memory card. (See screenshot below)

Tip
To Temporarily Remove the ReadyBoost Device
NOTE:
If you wanted to temporarily remove the USB flash drive or memory card that ReadyBoost is currently using, then this will show you how to safely remove it.
1. Open the Start Menu and click on Computer, then right click on the USB flash drive or flash memory card being used by ReadyBoost, and click on Eject. (See screenshots below)


A) Click on Continue. (See screenshot below)

B) Go to step 3.
OR
2. Click on the Safely Remove Hardware icon in the notification area on the right side of the taskbar, then click on the USB flash drive or flash memory card being used by ReadyBoost to eject it. (See screenshot below)

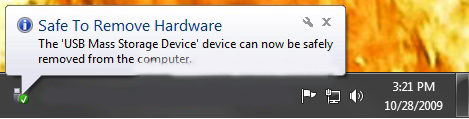
3. When you see this, it is now safe to remove the USB flash drive or flash memory card. (See screenshot below)
4. When ready, you can just plug the USB flash drive or flash memory card back in to have ReadyBoost automatically start using it again.


