
How to Slipstream Windows 7 SP1 to Create a Installation DVD or ISO File
Information
This article will show you how to slipstream Windows 7 SP1 with your retail copy of Windows 7 without SP1 to create a Windows 7 with SP1 installation "DVD" or a bootable Windows 7 with SP1 "ISO file".
You could also use the ISO file to create a bootable Windows 7 installation USB flash drive with. For how, see part 2 here: Windows 7 USB/DVD Download Tool
Warning
You can only do this tutorial while logged in as an administrator.
You can only do this using a retail copy of a Windows 7 installation DVD or ISO file.
You can only create a 64-bit slipstreamed Windows 7 SP1 DVD or ISO if your current Windows 7 installation is also 64-bit.
You can create a 32-bit slipstreamed Windows 7 SP1 DVD or ISO if your current Windows 7 installation is 32-bit or 64-bit.
When you install Windows 7 SP1 using the slipstreamed Windows 7 SP1 DVD or ISO created in this tutorial, you will not be able to uninstall SP1 since the slipstreaming process removes the backup files automatically like how the SP1 Disk Cleanup Tool does.
Note
This tutorial is designed to be followed like a flow chart to help make it easier to use and select the options (ex: DVD or ISO) you want.
Here's How:
1. If you have not already, then you will need to download the 32-bit or 64-bit Windows 7 SP1 EXE installation file for your same 32-bit (x86) or 64-bit (x64) Windows 7 installation DVD or ISO file, and save the SP1 EXE to your desktop.
Note
The Windows 7 SP1 RTM will be released on February 22nd 2011 to the public. I will update this step to include the download link at that time.
TechNet and MSDN paid subscribers were able to get the Windows 7 SP1 RTM ISO file on February 16th 2011 at the Technet and MSDN subscriber downloads section.
A) Right click on the downloaded SP1 exe installation file, click on Properties, click on the General tab, and click on Unblock.
NOTE: If you do not have a Unblock button under the General tab, then the SP1 exe file is already unblocked and you can continue on to step 2.
2. If you have not already, then you will need download and install the free 32-bit or 64-bit RT Seven Lite beta 2.6.0 or newer build for your same 32-bit or 64-bit Windows 7 installation DVD or ISO file.
NOTE: You will need to scroll down a bit to see the newer downloadable builds of RT Seven Lite at that link.
3. Click on the RT Seven Lite shortcut on your desktop or in the Start Menu to run the program. (see screenshot below)

A) Do either step 4 or 5 for what you have to use to integrate the Windows 7 SP1 into.
4. To Select and Use a Retail Windows 7 Installation DVD without SP1
A) Insert your retail Windows 7 installation DVD into the DVD drive and close it. If a AutoPlay pop-up opens, close it.
B) In RT Seven Lite, click on the Browse button, and select the Select OS path option. (see screenshot below)
NOTE: If you do not have much else running, then you may wish to change the Set priority setting to High first to help speed the slipstreaming process up some.

C) Navigate to and select your DVD drive with the retail Windows 7 installation DVD in it from steps 4A, and click on OK. (see screeshow below)

D) Click on OK. (see screenshot below)

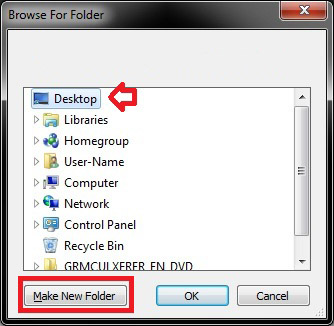
E) Select your Desktop, and click on the Make New Folder button. (see screenshot below)

F) Select the New folder on the desktop, and click on OK. (see screenshot below)

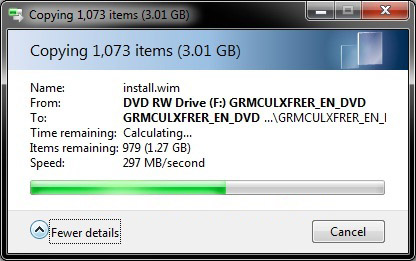
G) The contents of the Windows 7 installation DVD from steps 4A and 4C will now be copied into the New folder (step 4F) on the desktop. (see screenshot below)
NOTE: This may take a few minutes to complete.
H) Go to step 6.
5. To Select and Use a Retail Windows 7 ISO File without SP1
A) In RT Seven Lite, click on the Browse button, and select the Select ISO file option. (see screenshot below)
NOTE: If you do not have much else running, then you may wish to change the Set priority setting to High first to help speed the slipstreaming process up some.

B) Click on the Select a ISO button. (see screenshot below)

C) Navigate to and select the retail Windows 7 ISO file, and click on Open. (see screenshot below)

D) Select the Extract path button. (see screenshot below)

E) Select your Desktop, and click on the Make New Folder button. (see screenshot below)
F) Select the New folder on the desktop, and click on OK. (see screenshot below)

G) Click on OK. (see screenshot below)

H) The contents of the Windows 7 ISO file from step 5C will now be extracted and copied into the New folder (step 5F) on the desktop. (see screenshot below)
NOTE: This may take a few minutes to complete.

I) Continue on to step 6.
6. When finished, select (dot) the Windows 7 edition that is the same as the DVD (step 4A) or ISO file (step 5C). (see screenshot below)

7. Check the Slipstream Service Pack box, and click on OK. (see screenshot below)

8. Click on the Browse button. (see screenshot below)

9. Navigate to and select the Windows 7 SP1 EXE installation file from step 1, and click on Open. (see screenshot below)

10. Click on the Start button. (see screenshot below)

11. RT Seven Lite will now start preparing, integrating, and saving the SP1 (step 9) with the DVD (step 4) or ISO file (step 5). (see screenshots below)
NOTE: This will take a while to complete.


12. When finished, click on the Proceed button. (see screenshot below)

13. RT Seven Lite will now start start loading the image. (see screenshot below)
NOTE: This will take a few minutes to complete.

14. When finished, click on the Task tab in the left pane. (see screenshot below)

15. Check the ISO Bootable box option, and click on the ISO-Bootable tab in the left pane. (see screenshot below)

A) Do either step 16 or 17 for what you would like.
16. To Burn a Windows 7 SP1 Installation DVD
A) Insert a blank DVD (ex: DVD-R) into the DVD drive and close it. If a AutoPlay pop-up opens, close it.
B) In RT Seven Lite, select the Direct Burn drop down menu option under Mode, select the DVD drive letter used from step 16A under Device, then click on the Direct Burn button towards the bottom right. (see screenshot below)

C) RT Seven Lite will now start creating the image. (see screenshot below)
NOTE: This will take a few minutes to complete.

D) When finished, click on OK. If a AutoPlay pop-up opens, close it. (see screenshots below)

E) You now have a slipstreamed Windows 7 with SP1 installation DVD.
F) Go to step 18.
17. To Create a Windows 7 SP1 ISO File
A) In RT Seven Lite, select the Create Image drop down menu option under Mode, then click on the Make ISO button towards the bottom right. (see screenshot below)

B) Navigate to and select your Desktop, type in a name that you want for the ISO file, then click on the Save button. (see screenshot below)

C) When finished, click on OK. (see screenshot below)
D) You now have a slipstreamed Windows 7 with SP1 bootable ISO file.
NOTE: You could also use this ISO file to create a Windows 7 with SP1 bootable installation USB flash drive with. For how, see part 2 here: Windows 7 USB/DVD Download Tool
E) Continue on to step 18.
18. Close RT Seven Lite.
19. Click on Yes to confirm closing RT Seven Lite.
20. RT Seven Lite will now clean up it's temp files before closing. (see screenshot below)


